We're often asked if we can repair AVI files. The answer is – YES, we can, but still Restore.Media doesn't support this specific format. Why? Because anyone can repair a corrupted AVI video in just a few minutes absolutely free of charge.

In this article we share details on how to repair AVI files with different 3rd-party free tools.
Please note that we’re not affiliated with these tools in any way and do not provide support for them. If you encounter any issues when using the tools, please contact their developers directly.
We also suggest that you create a backup of your files prior to using any video recovery software.
AVI files have quite a simple structure. You don't have to pay for repairing broken AVI files, just follow the instructions bellow:
First, you need to have all the necessary codecs installed. If you have them already, you can skip this step.
- For Windows users we advise to install the K-Lite Codec Pack. It's free, yet the most reliable codec pack we're aware of. It also comes with a great media player – Media Player Classic.
- For macOS users, we suggest to install the VLC media player. It's also free and comes with most common codecs you may need to play AVI files.
Note: do not install multiple different codec packs on the same computer as they may have conflicts and cause issues when playing media files.
Now that you have codecs installed, try to play the AVI file. If you still can't open the file, your media player reports some errors, or the video freezes at some point, then you may try one of the following options:
Note: we suggest that you create a backup copy of your corrupted AVI file, so that you can always get back to it and have the original source file in case anything goes wrong with the tools described below.
Option 1. Re-save Your Damaged AVI File with VirtualDub
VirtualDub is a free tool that allows you to do some basic editing of the AVI videos. What's important, it can identify a number of issues in an AVI file, including a broken index, and fix these issues automatically when you re-save the file with the tool. Unfortunately, though, VirtualDub is available only for Windows users, so if you're on a Mac, skip to the next option.
Here is how to repair AVI files with VirtualDub:
1. Download the tool from this page.
2. Unzip the downloaded archive and launch the tool by double-clicking on the VirtualDub.exe file.
3. In the appeared window click File -> Open video file… and then select your corrupted AVI file.
4. If you get the following error (or alike):
Couldn't locate decompressor for format "H264" (unknown)
... then you need to install the ffdshow decoder, here is how:
4.1 Download ffdshow from this page.
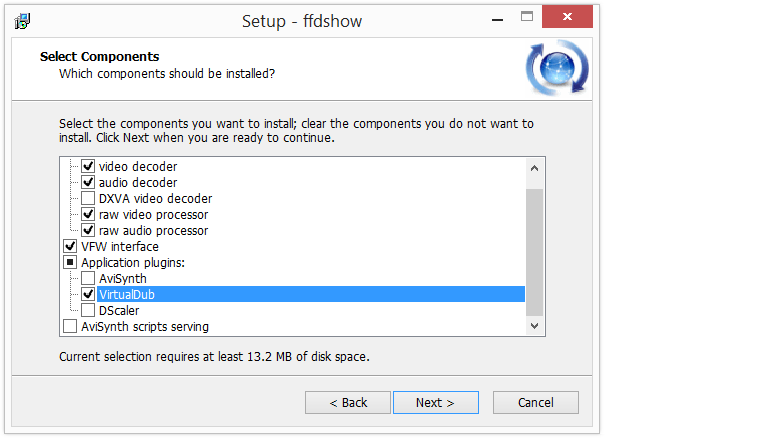
4.2 Close your VirtualDub application. Then launch the downloaded ffdshow installation pack and follow the instructions. Make sure to select the VirtualDub application plugin like shown on the screen below:
4.3 Once the installation is completed, launch the VirtualDub tool again and then click File -> Open video file… to open your broken AVI video.
5. At this stage VirtualDub will display all the errors it can find in your AVI file:
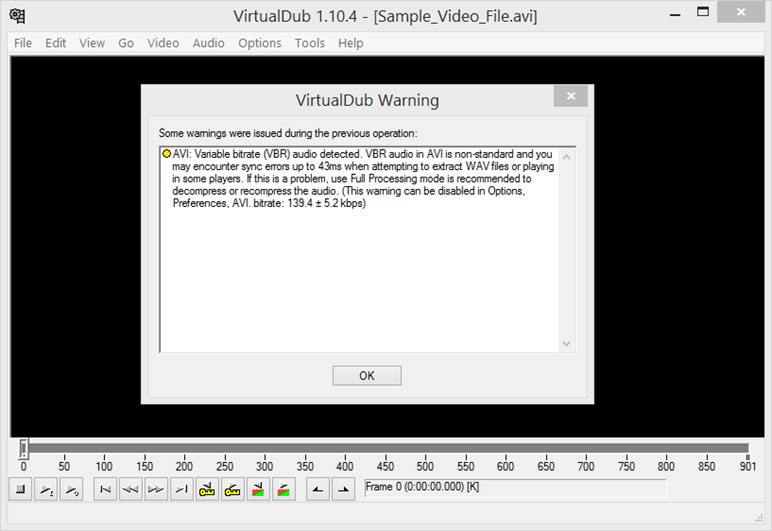
6. Click Ok to close the warning window.
7. Click Video from the app menu and choose Direct stream copy. This makes sure your AVI video will be re-saved with the same compression settings as in your original file.
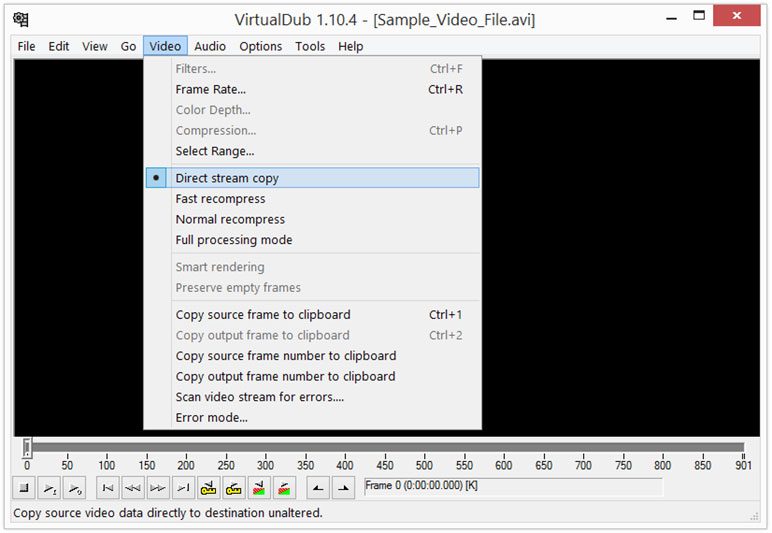
8. Click Audio and choose Direct stream copy. This is the same setting as the above, but for the audio stream.
9. Now, save your damaged AVI video to a new file. For this click File -> Save as AVI… from the app menu. In the appeared window select where you want to save the new file and give it a name. We recommend that you save it as a separate file, so that you have your original AVI video as a backup.
That's it! Your newly saved AVI file should play fine now. When saving the file, VirtualDub fixes most of the issues it can find.
However, if you still can't open the file, or the time slider doesn't work properly, you may try one of the options below.
Option 2. Repair AVI Files with DivFix++ (Available for Windows and macOS)
This is another free tool that can fix broken AVI files and is available for Windows and macOS users. This time we'll give a guide for Mac users, but the workflow on Windows is pretty much the same.
1. Download DivFix++ from this page and launch the tool.
2. Click Add Files and select your corrupted AVI file. If you have multiple damaged AVI files, you can add all of them at once.
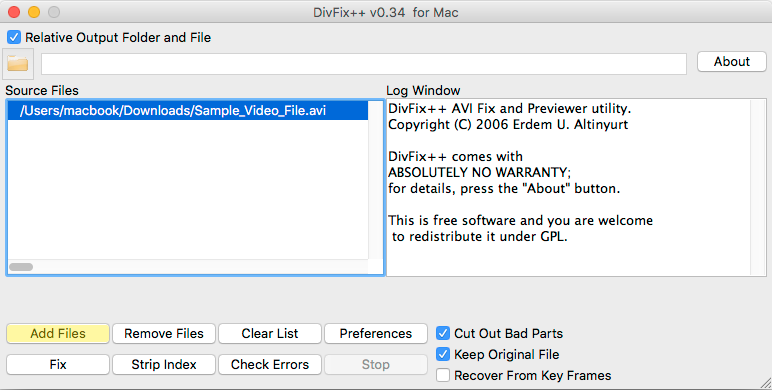
3. At the bottom of the app there are two options that you should be aware of:
- Cut out bad parts. When selected, DivFix++ will remove corrupted parts of the video that can't be salvaged by the tool. This option is recommended, but keep in mind that the output file may miss some of the video chunks.
- Keep original file. When selected, VirtualDub will keep your original AVI file untouched, while the fixed video will be saved to a new file. We recommend to keep this option selected too.
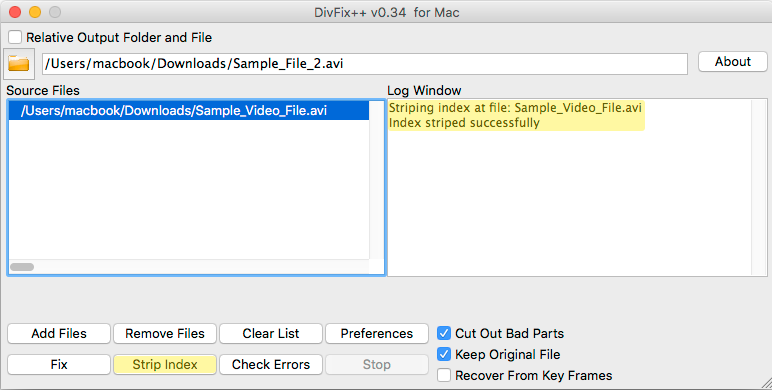
4. Click Strip Index to clear existing indices from your AVI file as they may be damaged. Once finished, you should see a confirmation message in the log window:
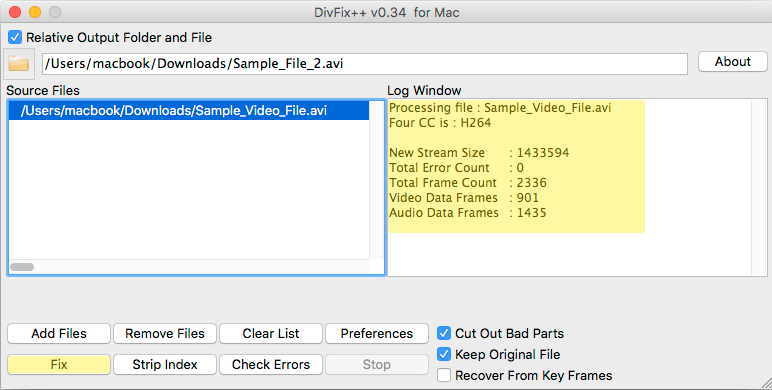
5. Now, click on the Fix button to repair your corrupted AVI file. Depending on the video size, it may take up to several minutes to fix the file. Once finished, you will see a confirmation message in the log window:
Your new AVI file should work fine now.
In case you still can't play it, or if the time slider doesn't work, there is one more option:
Option 3. Fix Corrupted AVI Files with FFmpeg (Available for Windows and macOS)
This is the last option we'd like to cover in this article. FFmpeg is a powerful tool that can convert, record and stream audio and video files. With FFmpeg, you can completely rebuild the broken index of your corrupted AVI file. If the options described earlier didn't help, give this tool a try.
FFmpeg is available for Windows and macOS users. Since the workflow is slightly different, we'll provide separate guides for both versions.
Repair a Broken AVI Index with FFmpeg on Windows
1. Open your Windows File Explorer and go to C:\Users\My_Name, where My_Name – should be your own username. In this directory create a new folder and give it a name like RepairAVI. If you'll choose another name for the folder, we recommend writing it in English letters and without any spaces. The resulting destination of the folder should look the following way:
C:\Users\My_Name\RepairAVI
2. Download the FFmpeg tool from this page.
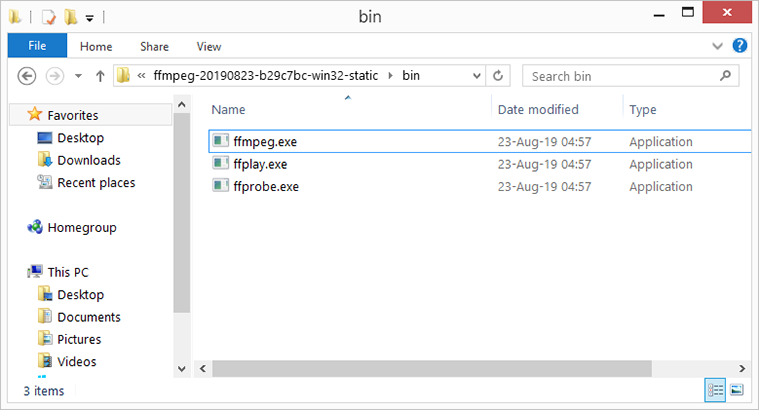
3. Extract the downloaded archive and then find the "bin" folder among extracted files. In the "bin" directory there should be 3 files there:
4. Copy the ffmpeg.exe file and your corrupted AVI files to the folder you've created on step 1. In our example we need to copy these files to the following folder:
C:\Users\My_Name\RepairAVI
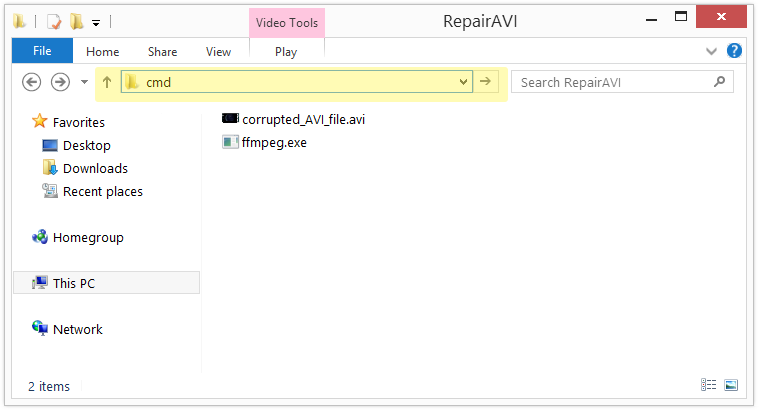
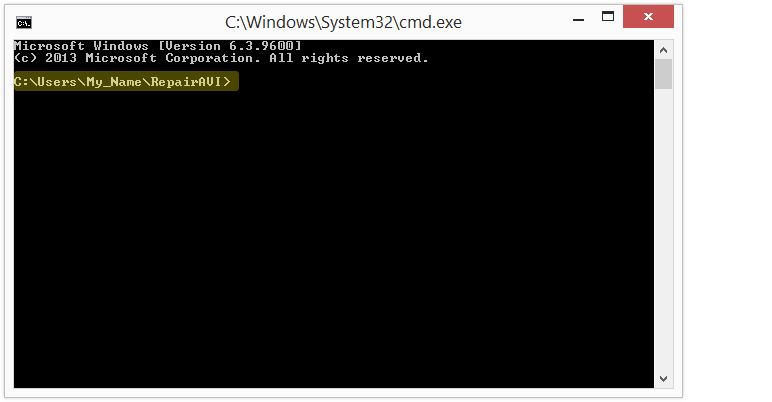
5. Launch the Command Prompt. For this, go to the folder you created on step 1, remove path from the address bar, then type cmd and press Enter. This should look the following way:
6. Once the Command Prompt is launched, you should see the following window:
7. Now, copy-paste the following command in the Command Prompt and press Enter:
ffmpeg -i input.avi -c:v copy -c:a copy output.avi
, where:
- input.avi – name of the corrupted file. You should replace it with the name of your corrupted AVI video.
- output.avi – name of the repaired AVI file. You can use any other name you want for your repaired AVI file.
- -c:v copy and -c:a copy – these arguments tell FFmpeg to copy the video and audio streams of the original AVI file to the repaired one.
In the Command Prompt this should look the following way:
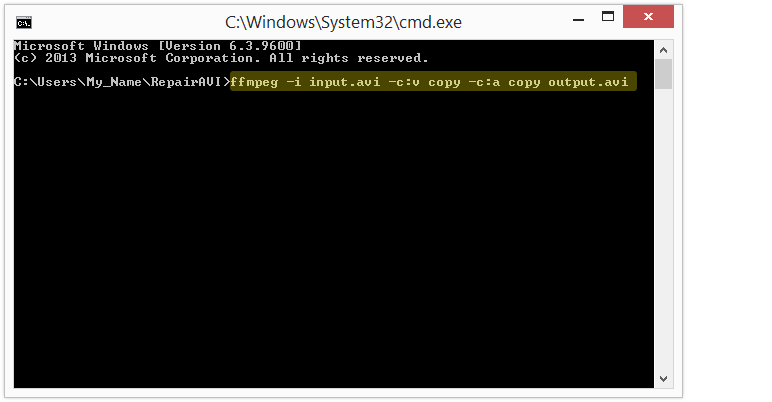
Press Enter to run the command. Once finished, you should find the fixed AVI file in the same directory where your damaged file is located.
Repair a Broken AVI Index with FFmpeg on macOS
The easiest way to install FFmpeg on macOS is by using a package manager – Homebrew. Here is how to do this:
1. Open the Terminal app. For this press Command + Spacebar, type "Terminal" in the appeared search field and then double-click on the Terminal app.
2. In the Terminal run the following command (just copy-paste it and then press enter). This will install the Homebrew app on your Mac:
/usr/bin/ruby -e "$(curl -fsSL https://raw.githubusercontent.com/Homebrew/install/master/install)"
Note: after running this command you may get the following message:
Press RETURN to continue or any other key to abort
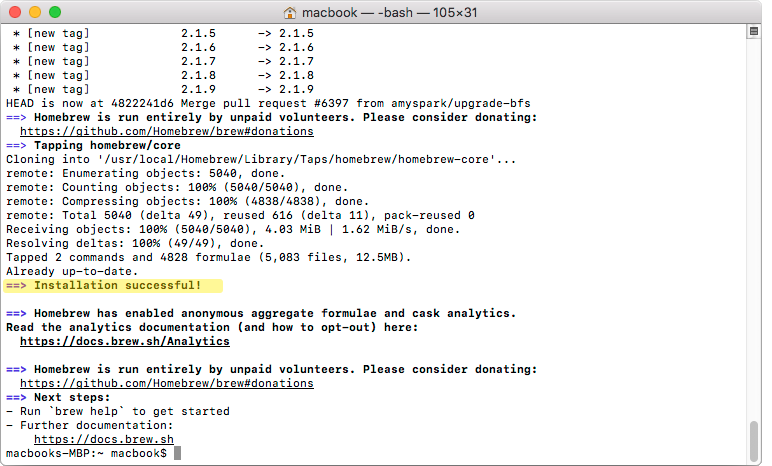
Just press Enter to start the installation, which may take a few minutes. Once installed, you will get a confirmation message:
3. Now, run the following command to install FFmpeg (just copy-paste it into the Terminal and then press Enter):
brew install ffmpeg
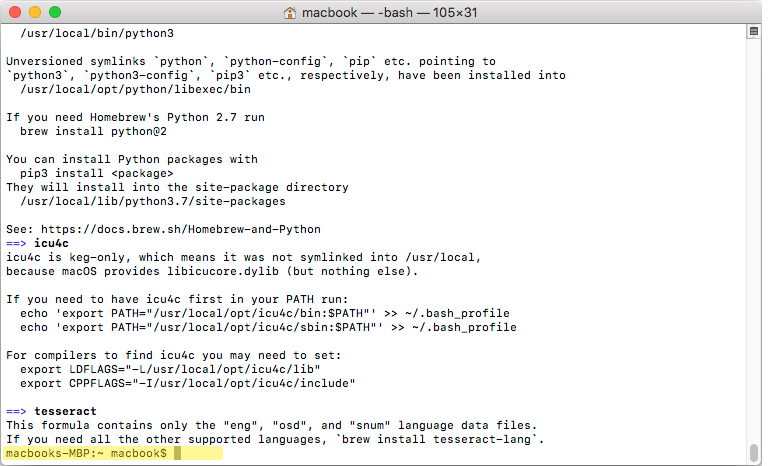
4. The installation may take a few minutes. Once completed, the terminal will look this way:
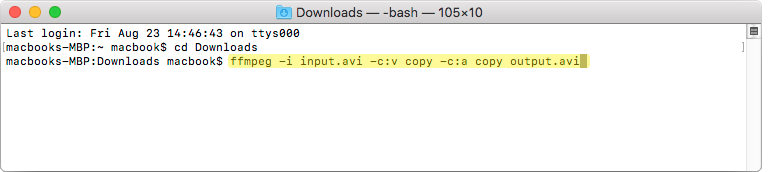
5. Specify the directory with your broken AVI file. For this run the following command in the Terminal:
cd Downloads
In this example, our damaged AVI video is located in the Downloads folder. You may specify any other directory where your broken AVI file is stored.
6. Now, you can try to repair your corrupted AVI file with the FFmpeg tool by running the following command:
ffmpeg -i input.avi -c:v copy -c:a copy output.avi
, where:
input.avi – name of the corrupted file. You should replace it with the name of your corrupted AVI video.
output.avi – name of the repaired AVI file. You can use any other name you want for your repaired AVI file.
-c:v copy and -c:a copy – these arguments tell FFmpeg to copy the video and audio streams of the original AVI file to the repaired one.
In the Terminal this should look the following way:
Press Enter to run the command. Once finished, you should find the repaired AVI file in the same directory where the damaged file is located.
___________
We hope these great tools will help you repair AVI files without any hassles. Still, if you have any questions or need help, please feel free to drop us a line.
Happy recovering!